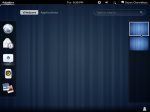
At last I got my pen drive and the first thing I tried out was Gnome 3 Live USB Stick and it was splendid. A main transformation was the design of GNOME 3, and as a result it was an all new Gnome experience!
In this article you will get to know how to create a Gnome 3 Live USB Stick.
1. Download the Live Images of Gnome 3 from gnome.org of your choice.
2. Now, download the tarball package of the USB Writer Image and extract it’s contents to a folder.
3. Now navigate to the extracted folder.
4. Prepare the image writer by running this command in a terminal:
$ chmod a+x ./image-usb-stick
5. Now insert the USB storage device you want to make it a Live USB device.
6. Run the image writer script from a terminal:
$sudo ./image-usb-stick path_to_the_live_image.iso
7. Now reboot your system with your USB stick attached.
Enjoy Gnome 3 😛